A leaking tap may seem like a small inconvenience, but even a slow drip can waste litres of water every day and increase your utility bills over time. Many homeowners ignore dripping taps until the problem becomes worse, leading to damaged fittings, water stains, or even pipe corrosion. The good news is that most leaking taps can be repaired at home with a few basic tools and quality replacement parts.
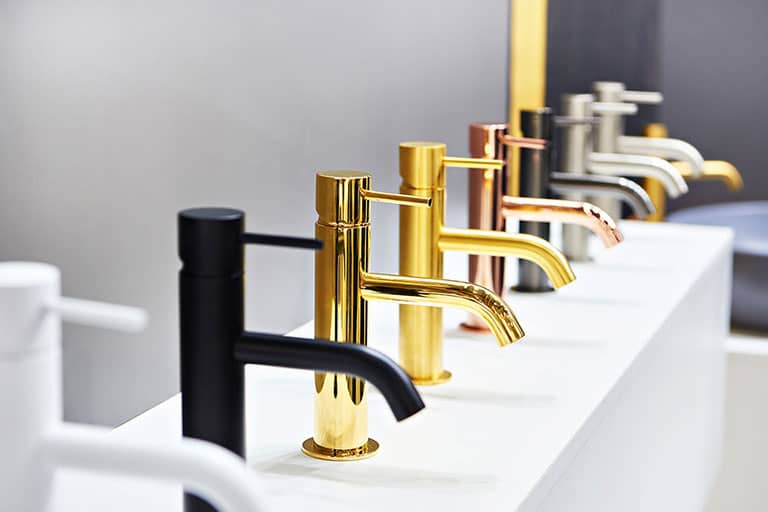
Whether you are dealing with a traditional compression tap or a modern mixer tap, this step-by-step guide will help you identify the cause of the leak and fix it safely. Using high-quality components from trusted providers of Plumbing supplies Manchester homeowners rely on can make your repair last longer and reduce future plumbing issues.
This guide is designed to provide practical, beginner-friendly advice while following modern plumbing standards for 2026.
What Causes a Tap to Leak?
Before starting any repair, it is important to understand why taps leak in the first place. Identifying the source of the problem helps you choose the correct replacement parts and repair method.
Worn-Out Washer
One of the most common causes of leaking taps is a damaged washer. Washers are small rubber components that create a watertight seal when the tap is turned off. Over time, constant friction causes them to wear down, leading to dripping water.
Signs of a worn washer include:
Constant dripping from the spout
Squeaking noises when turning the tap
Difficulty fully shutting off the water
Damaged O-Ring
An O-ring is a small rubber ring located around the tap stem. If it becomes loose, cracked, or worn, water may leak around the handle or base of the tap.
Corroded Valve Seat
The valve seat connects the tap to the spout. Mineral deposits and corrosion can build up over time, especially in hard water areas, causing leaks around the spout area.
Loose or Broken Parts
Loose nuts, worn cartridges, or damaged internal components can all lead to water leakage. In some cases, simple tightening may solve the issue.
High Water Pressure
Excessively high water pressure can force water through seals even when the tap is turned off. If leaks occur only at certain times, pressure issues may be the cause.
Tools and Materials You Will Need
Most leaking tap repairs require only a few standard plumbing tools.
Essential Plumbing Tools
You may need:
Adjustable spanner
Flat-head screwdriver
Phillips screwdriver
Allen keys
Pipe wrench
Plumber’s tape
Small cloth or towel
Replacement Parts
Depending on the tap type, replacement parts may include:
Rubber washers
Ceramic cartridges
O-rings
Tap valves
Seals
Choosing durable replacement parts is important. Many homeowners prefer buying from trusted Plumbing supplies Manchester stores to ensure compatibility and quality.
Safety Equipment
Keep the following nearby:
Protective gloves
Bucket or bowl for water collection
Old towels to absorb spills
Preparing Before You Start the Repair
Preparation is essential for a smooth and safe repair process.
Turn Off the Water Supply
Always switch off the water supply before dismantling any tap. Most sinks have isolation valves underneath. Turn these clockwise to stop water flow.
If isolation valves are unavailable, turn off the main water supply to the property.
Plug the Sink Drain
Small screws and components can easily fall into the drain during repairs. Use a sink plug or cloth to block the opening.
Identify Your Tap Type
Different taps use different repair methods. Common tap types include:
Compression taps
Mixer taps
Monobloc taps
Ceramic disc taps
Knowing your tap style helps you purchase the correct replacement parts.
Inspect the Leak Carefully
Determine where the leak is coming from:
Spout leak
Handle leak
Base leak
This will help you pinpoint the faulty component.
Step-by-Step Guide to Fixing a Leaking Compression Tap
Traditional compression taps are among the easiest to repair.
Step 1 – Remove the Tap Handle
Use a flat-head screwdriver to remove the decorative cap from the handle. Unscrew the fixing screw underneath and lift off the handle.
If the handle is stuck, gently wiggle it loose.
Step 2 – Unscrew the Tap Gland
Use an adjustable spanner to loosen the tap gland nut. Carefully remove the stem assembly.
Take note of how the components fit together for easier reassembly later.
Step 3 – Replace the Washer
At the bottom of the stem, you will find the rubber washer. Remove the old washer and replace it with a matching size.
Using high-quality washers from reliable Plumbing supplies Manchester merchants can help prevent recurring leaks.
Check the washer seat for dirt or corrosion before installing the new part.
Step 4 – Reassemble the Tap
Reinsert the stem assembly and tighten the gland nut securely, but avoid overtightening.
Replace the tap handle and fixing screw.
Step 5 – Turn the Water Back On
Restore the water supply slowly and test the tap.
If the leak has stopped, your repair is complete.
How to Fix a Dripping Mixer Tap
Mixer taps usually contain ceramic cartridges instead of rubber washers.
Understanding Ceramic Cartridge Taps
Ceramic cartridges control water flow using rotating ceramic discs. Over time, these cartridges can crack or wear out.
Removing the Cartridge
First, remove the tap handle using an Allen key or screwdriver. Carefully remove the retaining nut and pull out the old cartridge.
Installing a New Cartridge
Match the new cartridge exactly with the old one. Different brands and tap models require different cartridge sizes.
Local suppliers of Plumbing supplies Manchester products often stock a wide range of compatible cartridges.
Insert the new cartridge and secure it in place.
Testing the Tap
Turn the water supply back on and check for leaks. Test both hot and cold water functions.
How to Fix a Leaking Tap Base
Leaks around the base usually indicate worn seals or O-rings.
Common Causes of Base Leaks
Typical causes include:
Loose fittings
Worn O-rings
Damaged seals
Replacing the O-Ring
Disassemble the tap body carefully and locate the O-ring. Remove the damaged ring and replace it with a new one of identical size.
Apply plumber’s grease to improve sealing and reduce wear.
Applying Plumber’s Tape
Wrap plumber’s tape around threaded fittings to improve watertight seals during reassembly.
Common Mistakes to Avoid When Repairing a Tap
DIY plumbing repairs are usually straightforward, but mistakes can cause additional damage.
Over-Tightening Components
Excessive force can crack fittings or damage threads. Tighten components firmly but carefully.
Using Incorrect Replacement Parts
Wrong-sized washers or cartridges may worsen leaks. Always match parts accurately.
Forgetting to Turn Off the Water
Attempting repairs without isolating the water supply can cause flooding and water damage.
Ignoring Persistent Leaks
If leaks continue after replacing parts, there may be a larger plumbing issue requiring professional inspection.
When Should You Replace the Entire Tap?
Sometimes repairing a tap is not worth the effort or cost.
Signs Your Tap Is Beyond Repair
Consider replacing the tap if you notice:
Severe corrosion
Cracked tap body
Repeated leaks despite repairs
Loose internal fittings
Benefits of Installing a New Tap
Modern taps offer:
Better water efficiency
Improved appearance
Smoother operation
Reduced maintenance
Choosing the Right Replacement Tap
Look for:
Durable brass construction
Water-saving technology
Easy maintenance features
Manufacturer warranties
Quality taps from trusted Plumbing supplies Manchester stores often provide better long-term value.
Why Quality Plumbing Supplies Matter
The quality of your plumbing materials directly affects the lifespan of your repair.
Better Durability and Performance
Cheap replacement parts wear out faster and may fail unexpectedly. Professional-grade components provide better reliability.
Saving Money Long-Term
Using durable plumbing parts reduces repeat repairs and prevents water waste.
Expert Advice from Local Suppliers
Experienced plumbing merchants can recommend compatible parts and offer guidance for DIY repairs.
Finding Trusted Plumbing Supplies Manchester
Reliable plumbing suppliers provide:
Quality branded products
Technical support
Large product selection
Competitive pricing
This is especially useful for homeowners handling repairs themselves.
DIY Tap Repair vs Hiring a Professional Plumber
Not all plumbing problems should be handled alone.
Repairs Homeowners Can Usually Handle
DIY-friendly tasks include:
Replacing washers
Installing O-rings
Tightening loose fittings
Replacing cartridges
Situations That Need a Professional
Call a plumber if you experience:
Pipe leaks behind walls
Severe corrosion
Water pressure problems
Complex installations
Cost Comparison
DIY repairs are usually inexpensive, especially when only simple replacement parts are needed. Professional repairs may cost more but are essential for complicated issues.
Preventing Future Tap Leaks
Preventive maintenance can extend the lifespan of your taps and plumbing system.
Clean Taps Regularly
Mineral deposits can damage seals and cartridges. Regular cleaning helps prevent buildup.
Avoid Over-Tightening
Many people close taps too forcefully, which damages washers and seals.
Check for Small Leaks Early
Fixing small drips immediately prevents larger plumbing issues later.
Use High-Quality Plumbing Components
Choosing durable products from reliable Plumbing supplies Manchester providers helps reduce future repairs.
Frequently Asked Questions
Can I fix a leaking tap without replacing parts?
Sometimes tightening loose fittings can temporarily stop leaks, but worn components usually require replacement.
How long does it take to repair a leaking tap?
Most basic tap repairs take between 30 minutes and one hour.
Are leaking taps expensive to fix?
No. Most DIY tap repairs are affordable, especially when only washers or O-rings are required.
Which tools are essential for tap repair?
An adjustable spanner, screwdrivers, plumber’s tape, and replacement washers are usually enough for basic repairs.
Where can I buy plumbing supplies Manchester homeowners trust?
Many local plumbing merchants and trade suppliers offer quality plumbing parts, expert guidance, and affordable pricing.
Conclusion
Fixing a leaking tap at home is often much easier than many homeowners expect. With the right tools, quality replacement parts, and a step-by-step approach, you can solve most common tap leaks without calling a plumber.
Whether you are replacing a washer, installing a new cartridge, or repairing a leaking tap base, using reliable materials is essential for long-lasting results. Trusted providers of Plumbing supplies Manchester products can help you find the right components for your repair while offering expert advice when needed.
By addressing leaks quickly, you can save water, lower household bills, and prevent future plumbing damage. Regular maintenance and quality plumbing supplies will also help keep your taps functioning efficiently for years to come.